Don't you just love PS actions? I do. I have tons of them, actions to make stitches around something, actions to make buttons, actions to make a special effect, etc etc.
Have you ever wished that you could edit them, change a little something, for example, the size of the stitch, or a feathering set that's just too much?
I will show you how.
1. First, open an image, any image will do, it can be anything that you like, I suggest opening a jpg, not too big, just for the heck of this tutorial;
2. Let's take a quick look at your actions palette. Photoshop comes with some basic actions, let's load a set.
image 1
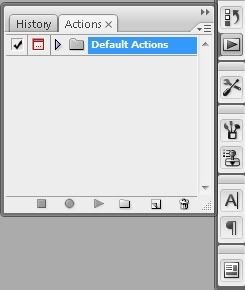
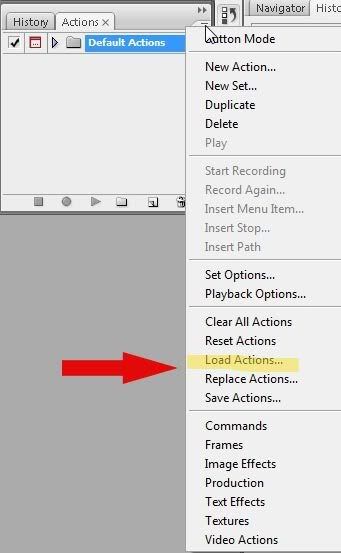
3. Open your actions palette, you should see a group of actions under "default actions". If it's not there, click on the drop down menu (refer to image), choose "load actions..." and browse for your photoshop preset folder - that will usually be at: yourcomputer>program files>adobe>adobe photoshop>presets>actions, and load any of the actions that you see in the actions folder. I am going to use one of the default actions for this tutorial. If you want to use the same action as me but you dont' have the default actions loaded, you can reset your actions palette by clicking on the drop down menu, and choosing "reset actions". If you have other actions in your palette, you might want to "append" these when you're prompted.
image 2
4. Click on the little arrow beside the default actions on the action palette. That will expand the folder so you can see all the actions in that group (the default actions is a group of actions, an "action set").
5. Highlight the first one on the list "vignette", and using the rounded marquee tool make a selection anywhere in your image:
image 3
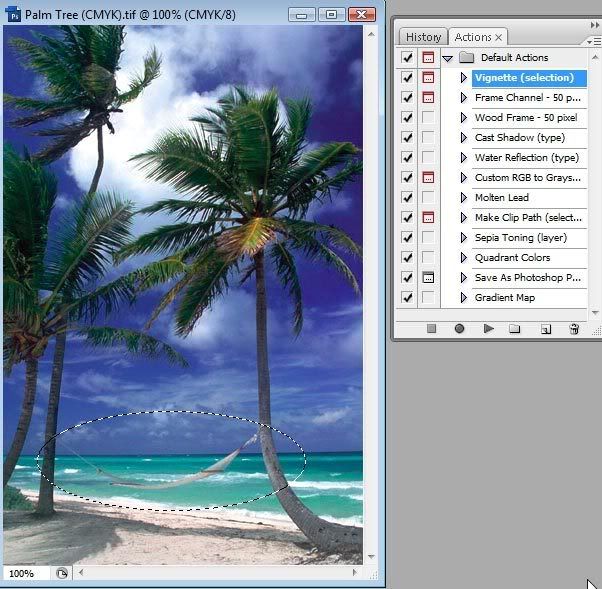
6. Play (run) the action; this particular action pauses and asks you for the amount of feathering you want to apply to the image, type any number you want and click ok. Now you have the action result. But you're not very happy with the action. You want the action to NOT stop and prompt you for the feathering, and you want the feathering be 10 everytime you run that action. Let's change it! ;)
7. Most important step of all in this tutorial: duplicate your action BEFORE you make any changes to it. To do so, highlight the action, drag and drop it on the "new action" icon on the bottom of your action palette. Now change the name of that duplicated action to anything you like.
8. click on the arrow beside the duplicated action to expand all the steps. Go ahead and click on the arrows inside that action to expand each and every step as well:
image 4

9. Now, make a selection anywhere in your image, as you did before. Double click on the "feather" step. When you are prompt to type the number, type anything that you like (other than 5, which is the default for this action step, I will type 15). Note: the record button on the bottom of your action palette is ON! ;) Click ok; the radius changed to 15 in your action step. Everytime that you run this action, the default feathering number will be 15.
image 5
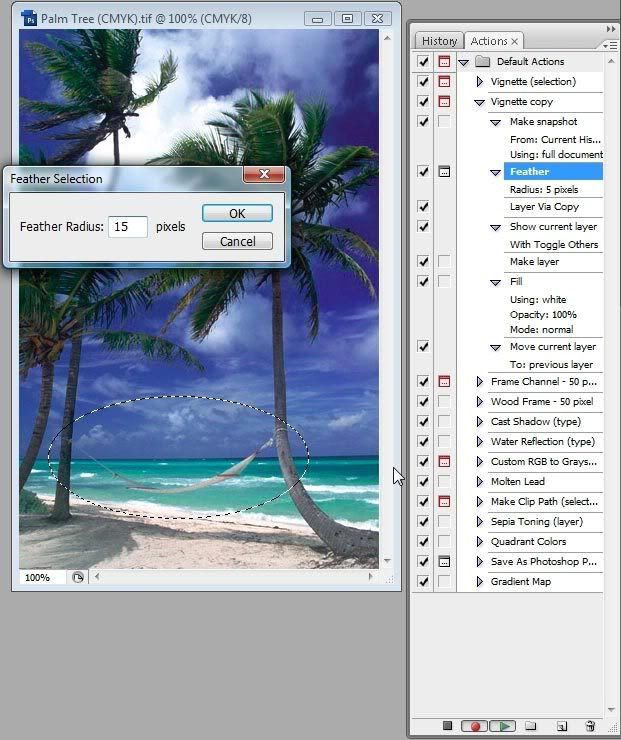
10. Let's make the action run without stopping to ask you for the feather number. Do you see that little square right beside the feather step? Click on it to disable it. Don't worry, you can unable it again by simply clicking on it.
11. Now go back to your image, make a selection, and run your new edited action! Enjoy! =)
If you have any questions about my tutorial, feel free to post it here or email me.
..:: ::..
..:: ::..
No comments:
Post a Comment